WordPress Free SSL plugin install
Today we will discuss about SSL Zen plugin installation which allows you to generate a free Let’s Encrypt certificate. If you have access to yours cPanel, you can easily add a free SSL certificate for wordpress site.
Step-1
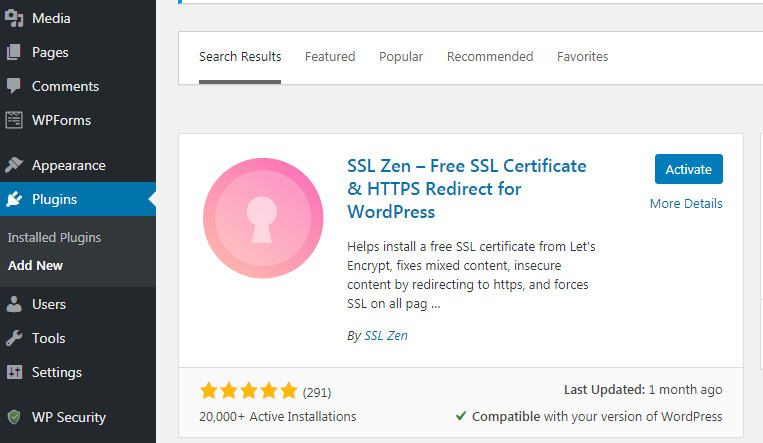
Install the SSL Zen plugin and activate it.
Step – 2
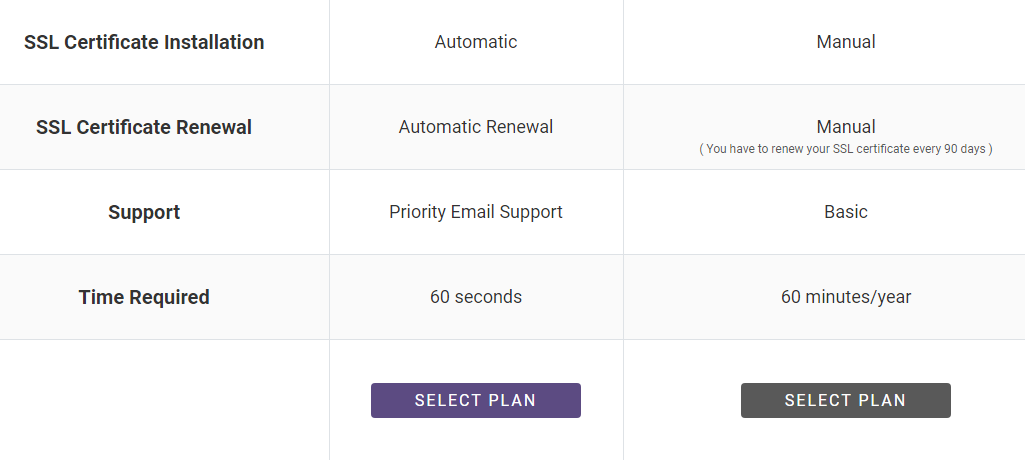
After active this will take you to select plan option. They have two option one is Professional which will auto generate certificate periodically and the free version [ manually install the certificate every time after expire].
Step -3
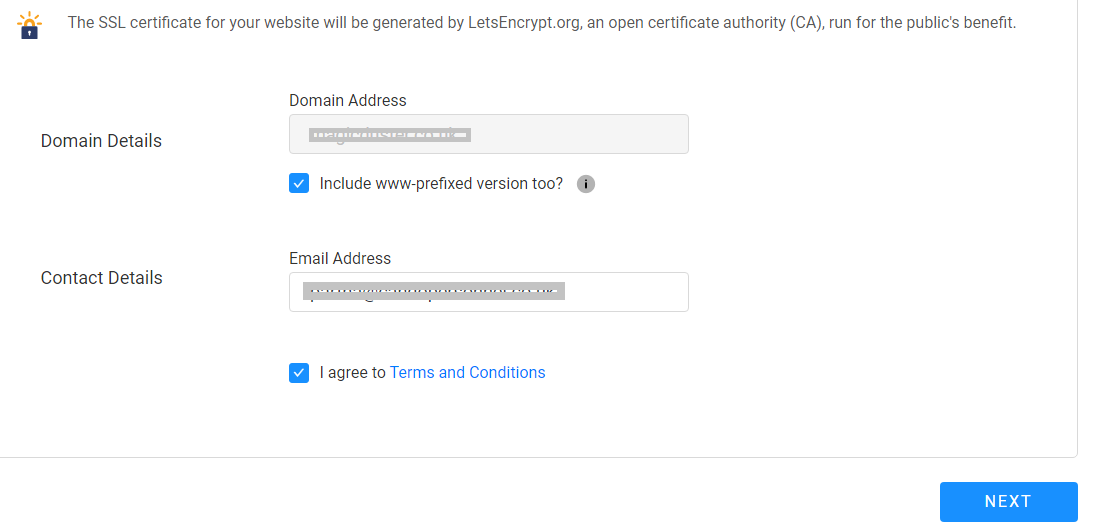
In next screen you need to just verify your website name and email address, press agree and click next.
Step – 4
This step is very important if you have access to your cpanel , then we recommend that you should select DNS and click next.
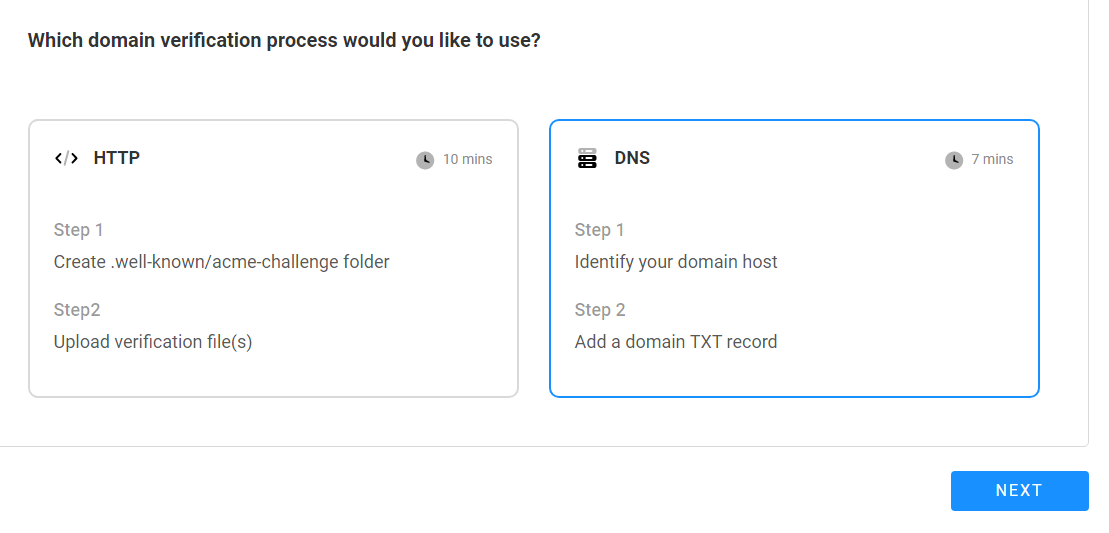
Step – 5
After select DNS you will find the DNS verification screen. You have to copy both the record from here.
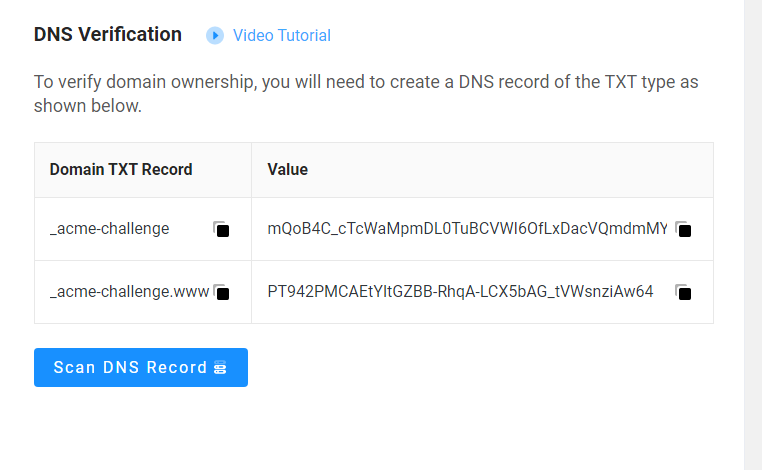
Login to your Cpanel and click Zone Edit and add both the records as follows –
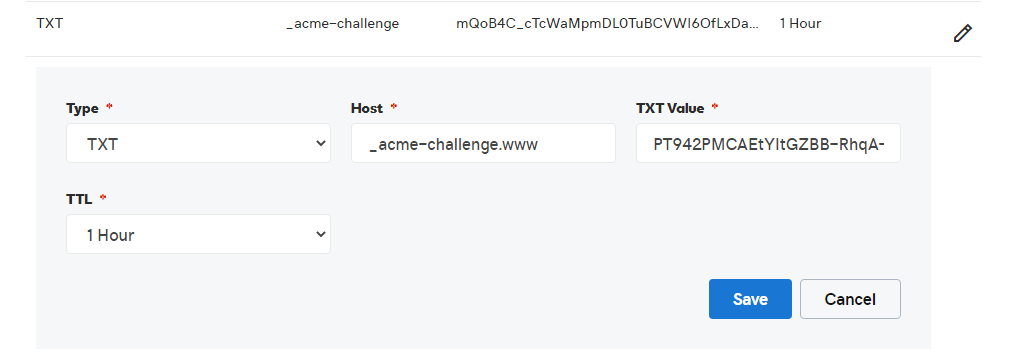
After adding the records, again come back to your previous screen in WP Dashboard and press Scan DNS Record for verification.
Step – 6
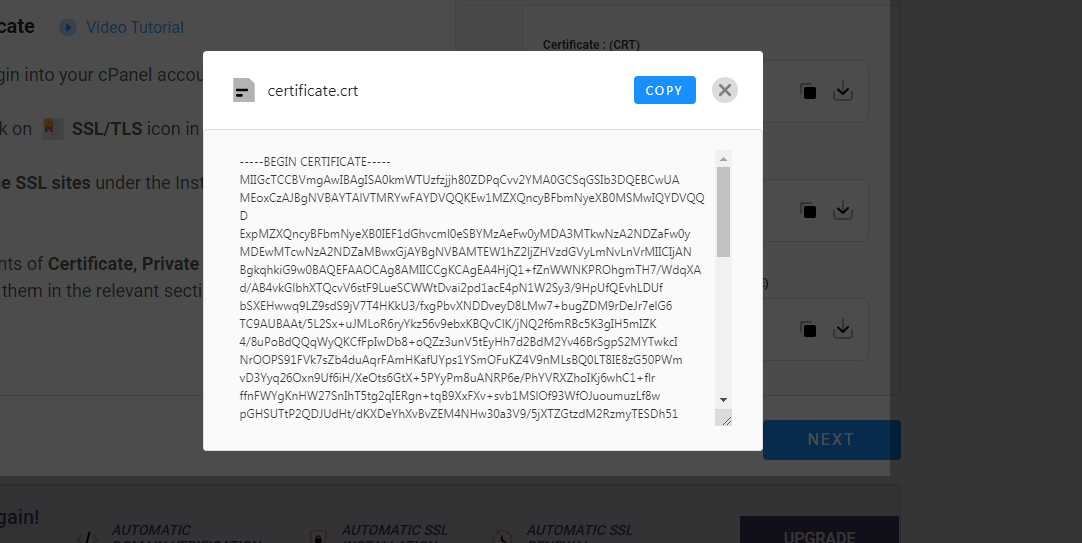
The next screen is installation of certificate.
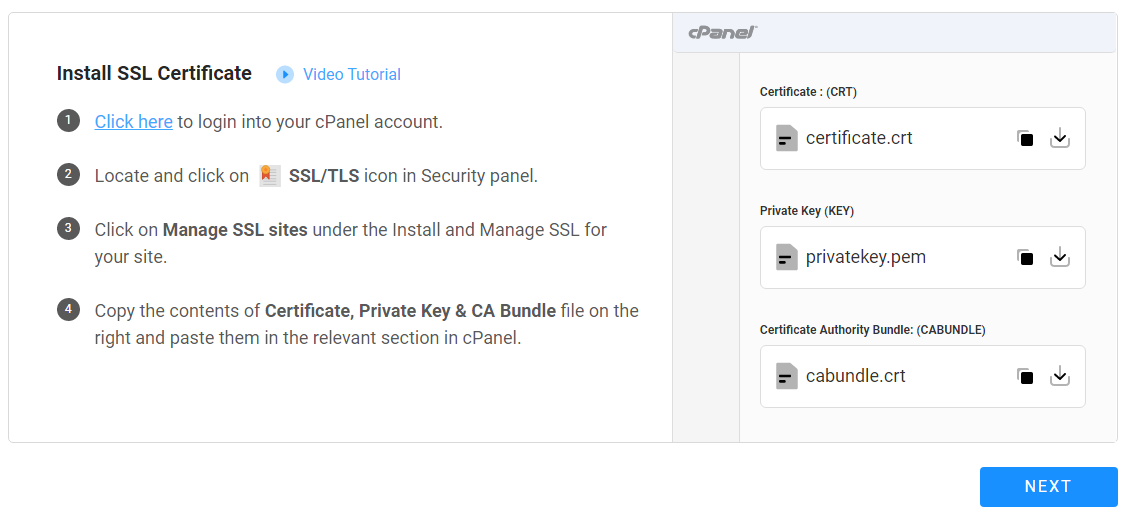
You have to click each black square button to copy each certificate.
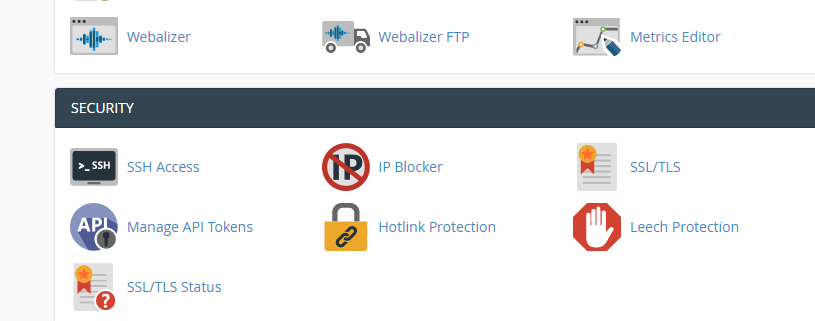
And now open your Cpanel again and select SSL/TLS and go to Manage Certificate.
Select the domain name and paste each file signature in different box as shown below –
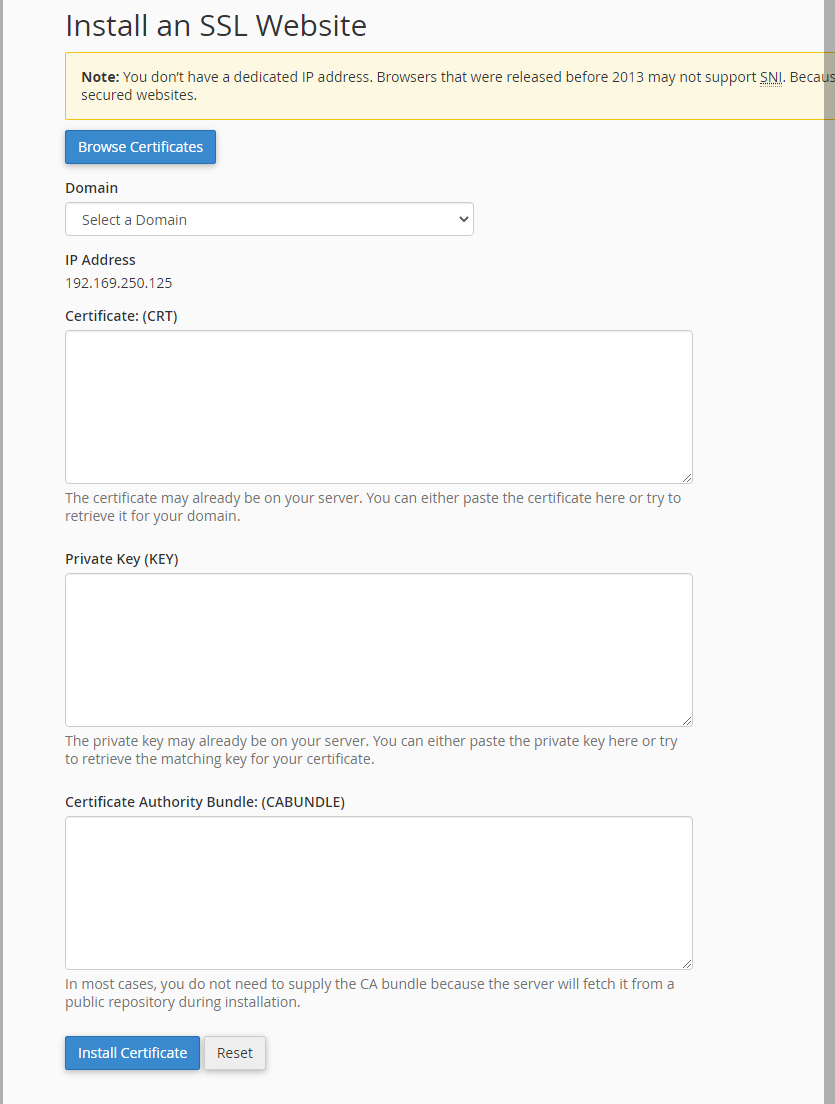
Click on install certificate to finish.
Step – 7
Now in final step , back to your Dashboard and select the checkbox and click next to finish the process.
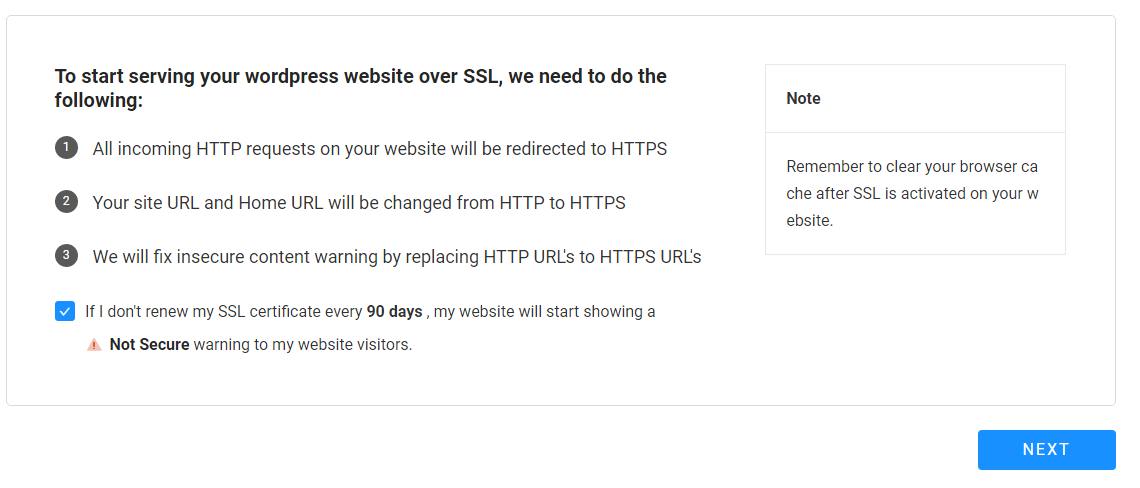
Congratulation : ) your have now successfully installed the SSL certificate.


